2つの数値を比較し、大きい方、或いは小さい方を返します。
大きい数値は System.Math.Max()関数をコールします。
小さい数値は System.Math.Min()関数をコールします。
// 2つの数値を比較して大きい方を返す場合の例(小さい方が欲しい場合はMin関数を)
int x = 15;
int y = 20;
int ans = Math.Max(x, y);
MessageBox.Show("大きいのは " + ans);
2つの数値を比較し、大きい方、或いは小さい方を返します。
大きい数値は System.Math.Max()関数をコールします。
小さい数値は System.Math.Min()関数をコールします。
// 2つの数値を比較して大きい方を返す場合の例(小さい方が欲しい場合はMin関数を)
int x = 15;
int y = 20;
int ans = Math.Max(x, y);
MessageBox.Show("大きいのは " + ans);
System.Math.Sqrt()関数をコールします。
// 2の平方根を計算し、メッセージボックスで答えを表示
double ans = Math.Sqrt(2);
MessageBox.Show(ans.ToString());
System.Math.Abs()関数をコールします。
引数の型はintをはじめ、byte、short、long、decimal、、、などなど
Math.Abs(-10); //-10の絶対値を取得。答えは10
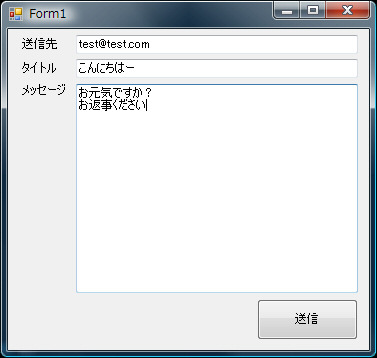
メールを送信する簡単なサンプルです。
送信先に,や;区切りでアドレスを入力し(1つでも構いません)
タイトルとメッセージを入力したら送信ボタンで送信します。
using System;
using System.Collections.Generic;
using System.ComponentModel;
using System.Data;
using System.Drawing;
using System.Text;
using System.Windows.Forms;
using System.Net;
using System.Net.Mail;

namespace WindowsFormsApplication1
{
    public partial class Form1 : Form
    {
        public Form1()
        {
            InitializeComponent();
        }

        private void buttonSend_Click(object sender, EventArgs e)
        {
            try
            {
                // 送信先を,や;区切りで複数指定されていれば分割し、mailTo配列に入れる
                string[] separator = { ",;" };
                string[] mailTo = textBoxSendTo.Text.Split(separator, StringSplitOptions.RemoveEmptyEntries);

                // 送信先が1件でもあれば
                if (mailTo.Length >= 1)
                {
                    MailMessage msg = new MailMessage(
                        "from@from.com",        // 差出人Fromアドレス
                        mailTo[0],              // 送信先アドレス
                        textBoxTitle.Text,      // タイトル名
                        textBoxMessage.Text);   // メッセージ

                    // ヘッダを追加する時はこんな感じで(任意)
                    msg.Headers.Add("X-Mailer", "hogehoge");

                    // 文字コードを設定
                    Encoding enc = Encoding.GetEncoding("iso-2022-jp");
                    msg.SubjectEncoding = enc;
                    msg.BodyEncoding = enc;

                    // 送信先が2件以上あればCCに追加
                    if (mailTo.Length >= 2)
                    {
                        foreach (string to in mailTo)
                            msg.CC.Add(to);

                        // 最初のアドレスはToと重複なので削除
                        msg.CC.RemoveAt(0);
                    }

                    // SMTPサーバーのアドレスとポート
                    SmtpClient sc = new SmtpClient("pop.hogehoge.jp", 25);

                    // IDとPassword
                    sc.Credentials = new NetworkCredential("id", "password");

                    // 暗号化のためのSSLを利用するか?
                    sc.EnableSsl = false;

                    // 呼び出しがタイムアウトになるまでの時間(ミリ秒)
                    sc.Timeout = 10000;

                    // メール送信
                    sc.Send(msg);

                    // リソース解放
                    msg.Dispose();
                }
            }
            catch (Exception ex)
            {
                System.Diagnostics.Debug.WriteLine(ex.Message);
            }
        }
    }
}
Win32APIのWritePrivateProfileString関数を使う例です。
Formに配置されたButtonを押すと書き込みます。
using System;
using System.Collections.Generic;
using System.ComponentModel;
using System.Data;
using System.Drawing;
using System.Text;
using System.Windows.Forms;
using System.Runtime.InteropServices;   // これが必要

namespace WindowsFormsApplication1
{
    public partial class Form1 : Form
    {
        // Win32APIを使う宣言
        [DllImport("KERNEL32.DLL")]
        public static extern uint WritePrivateProfileString(
          string lpAppName,
          string lpKeyName,
          string lpString,
          string lpFileName);

        public Form1()
        {
            InitializeComponent();
        }

        private void button1_Click(object sender, EventArgs e)
        {
            // iniファイル名を決める(実行ファイルが置かれたフォルダと同じ場所)
            string iniFileName = AppDomain.CurrentDomain.BaseDirectory + "hogehoge.ini";

            uint ret = WritePrivateProfileString(
                            "SECTION",      // セクション名
                            "KEY",          // キー名
                            "hogehoge",     // 書き込む値
                            iniFileName);   // iniファイル名

            if(ret == 0)
                MessageBox.Show("失敗");
            else
                MessageBox.Show("成功");
        }
    }
}
iniファイルはテキストファイルなので
直接iniファイルを開いて自力で解析する方法もありますが
Win32APIの GetPrivateProfileString関数 をC#から呼び出す例です。
GetPrivateProfileString関数はKERNEL32.DLLの中にその実態があるので
DLLをインポートする宣言を行っています。
このコードを動かす場合は
実行ファイルが置かれているフォルダにhogehoge.iniファイルを作成し
[SECTION]
KEY=hogehoge
のような2行を記述して保存しておいてください。
Formに配置されたButtonを押すと内容が表示されます。
iniファイルは簡単な構成で
[]でセクション名を囲み、次のセクション名まで
キー名=値
が続きます。改行区切りです。
例:
[section_1]
data=hogehoge
length=128
[section_2]
data=hogehoge
length=128
using System;
using System.Collections.Generic;
using System.ComponentModel;
using System.Data;
using System.Drawing;
using System.Text;
using System.Windows.Forms;
using System.Runtime.InteropServices;   // これが必要

namespace WindowsFormsApplication1
{
    public partial class Form1 : Form
    {
        // Win32APIの GetPrivateProfileString を使う宣言
        [DllImport("KERNEL32.DLL")]
        public static extern uint
          GetPrivateProfileString(string lpAppName,
          string lpKeyName, string lpDefault,
          StringBuilder lpReturnedString, uint nSize,
          string lpFileName);

        public Form1()
        {
            InitializeComponent();
        }

        private void button1_Click(object sender, EventArgs e)
        {
            // iniファイル名を決める(実行ファイルが置かれたフォルダと同じ場所)
            string iniFileName = AppDomain.CurrentDomain.BaseDirectory + "hogehoge.ini";

            // iniファイルから文字列を取得
            StringBuilder sb = new StringBuilder(1024);
            GetPrivateProfileString(
                "SECTION",      // セクション名
                "KEY",          // キー名
                "ありません",   // 値が取得できなかった場合に返される初期値
                sb,             // 格納先
                Convert.ToUInt32(sb.Capacity), // 格納先のキャパ
                iniFileName);   // iniファイル名

            MessageBox.Show(sb.ToString());
        }
    }
}
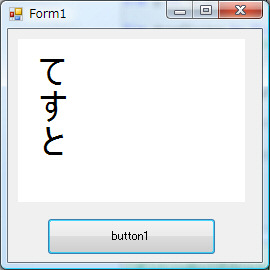
PictureBox内に文字列を縦に描画する例です。
頭に@が付く縦書き用フォントを利用することに注意です。
using System;
using System.Collections.Generic;
using System.ComponentModel;
using System.Data;
using System.Drawing;
using System.Text;
using System.Windows.Forms;

namespace WindowsFormsApplication1
{
    public partial class Form1 : Form
    {
        public Form1()
        {
            InitializeComponent();
        }

        private void Form1_Load(object sender, EventArgs e)
        {
            pictureBox1.BackColor = Color.White;
        }

        private void button1_Click(object sender, EventArgs e)
        {
            using (Graphics g = pictureBox1.CreateGraphics())
            {
                // 縦書き用フォントを利用
                using (Font font = new Font("@MS ゴシック", 24))
                {
                    // 縦方向にフォーマット
                    StringFormat sf = new StringFormat(StringFormatFlags.DirectionVertical);

                    g.DrawString("てすと", font, Brushes.Black, 10, 10, sf);
                }
            }
        }
    }
}
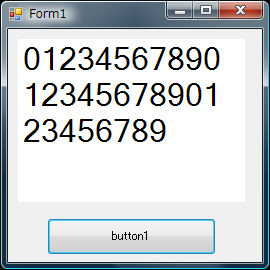
PictureBox内に文字列を折り返して描画する例です。
using System;
using System.Collections.Generic;
using System.ComponentModel;
using System.Data;
using System.Drawing;
using System.Text;
using System.Windows.Forms;

namespace WindowsFormsApplication1
{
    public partial class Form1 : Form
    {
        public Form1()
        {
            InitializeComponent();
        }

        private void Form1_Load(object sender, EventArgs e)
        {
            pictureBox1.BackColor = Color.White;
        }

        private void button1_Click(object sender, EventArgs e)
        {
            using (Graphics g = pictureBox1.CreateGraphics())
            {
                using (Font font = new Font("MS ゴシック", 24))
                {
                	// PictureBoxのクライアント領域いっぱいを矩形とします
                    RectangleF rect = new RectangleF(0, 0, pictureBox1.Width, pictureBox1.Height);

                    g.DrawString("012345678901234567890123456789", font, Brushes.Black, rect);
                }
            }
        }
    }
}
PictureBoxに文字列を描画する例です。

using System;
using System.Collections.Generic;
using System.ComponentModel;
using System.Data;
using System.Drawing;
using System.Text;
using System.Windows.Forms;

namespace WindowsFormsApplication1
{
    public partial class Form1 : Form
    {
        public Form1()
        {
            InitializeComponent();
        }

        private void Form1_Load(object sender, EventArgs e)
        {
            pictureBox1.BackColor = Color.White;
        }

        private void button1_Click(object sender, EventArgs e)
        {
            using (Graphics g = pictureBox1.CreateGraphics())
            {
                using (Font font = new Font("MS ゴシック", 24))
                {
                    g.DrawString("てすと", font, Brushes.Black, 0, 0);
                }
            }
        }
    }
}
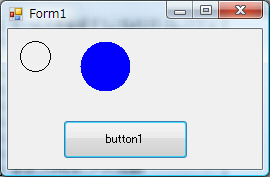
PictureBoxに円を描画する例です。
using System;
using System.Collections.Generic;
using System.ComponentModel;
using System.Data;
using System.Drawing;
using System.Text;
using System.Windows.Forms;

namespace WindowsFormsApplication1
{
    public partial class Form1 : Form
    {
        System.Diagnostics.PerformanceCounter pc = new System.Diagnostics.PerformanceCounter();

        public Form1()
        {
            InitializeComponent();
        }

        private void button1_Click(object sender, EventArgs e)
        {
            using (Graphics gra = pictureBox1.CreateGraphics())
            {
                // 円を描画
                gra.DrawEllipse(Pens.Black, 0, 0, 30, 30);

                // 中が塗りつぶされた円を描画
                gra.FillEllipse(Brushes.Blue, 60, 0, 50, 50);
            }
        }
    }
}